
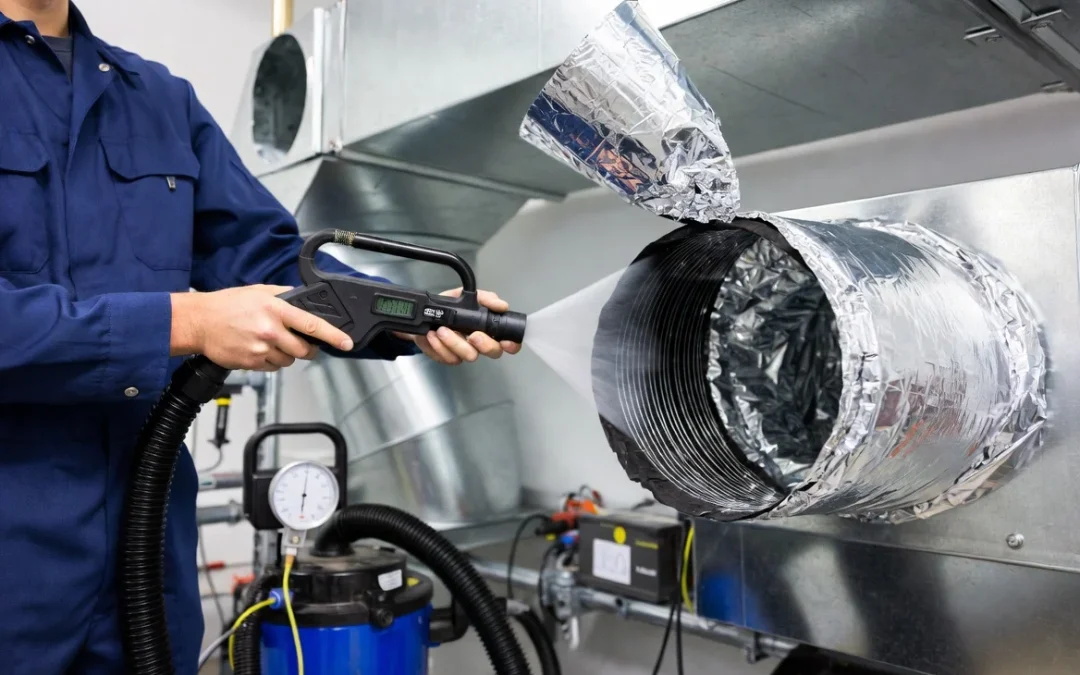
A rotary brush that works perfectly on 26-gauge sheet metal can shred a flex duct liner in under ten seconds. Most contractors do not find this out in a controlled setting. They find it out mid-job, staring at a torn inner liner and a customer asking why there is now insulation falling out of a supply register.
The mistake is rarely carelessness. It is a mental model problem. Contractors trained on rigid metal trunk lines carry that same agitation logic into flexible duct runs, because on the surface both are “just duct.” They are not. Flexible duct is a fundamentally different mechanical structure, and treating it like rigid sheet metal is the single most common cause of preventable duct damage in this trade.
This article breaks down why flex duct behaves the way it does under agitation and airflow, and what a correct, damage-free cleaning method actually looks like in the field. The equipment principles discussed here apply to any contractor running professional grade air duct cleaning equipment, regardless of brand.
Why Flexible Duct Requires a Different Cleaning Method
Flexible duct is a composite structure, not a solid tube. A standard residential or light commercial flex run is built from four layers working together: an inner liner (typically polyester or vinyl film), a helical steel or plastic wire coil that gives the duct its shape and crush resistance, a layer of fiberglass or polyester insulation, and an outer vapor barrier jacket.
Sheet metal duct resists mechanical force because the material itself is rigid. Flexible duct resists airflow load the same way sheet metal does, but it resists mechanical agitation completely differently. The wire helix provides structural memory, not structural strength in the way a welded seam does. Push a rotary brush against it with enough lateral force and the wire coil will deform locally before the liner tears, and once the liner tears, the insulation layer behind it starts shedding fiberglass directly into the airstream.
This is the vulnerability that flexibility creates. A rigid duct that gets scuffed by a brush stays rigid. A flex duct that gets scuffed the same way has already started a failure sequence that will not be visible again until the section is opened for inspection or replaced.
The practical consequence for a cleaning crew is that flex duct cleaning is not a lighter version of sheet metal cleaning. It is a different discipline with its own tool selection, force limits, and inspection standards.
Flex Duct vs Sheet Metal Duct Cleaning
The differences between the two duct types affect nearly every decision a technician makes on site, from tool choice to how long the section is expected to last after service.
| Factor | Sheet Metal Duct | Flexible Duct |
| Structural durability | High. Rigid gauge steel or aluminum resists deformation | Moderate. Wire helix can deform or separate under lateral force |
| Allowable agitation force | Stiff rotary brushes, moderate to high compressed air PSI | Soft agitation tools, reduced PSI, controlled contact only |
| Brush compatibility | Full range of rotary brush sizes and bristle stiffness | Soft nylon or foam tools only, never wire or stiff nylon brushes |
| Compressed air use | Full-force air whips acceptable in most configurations | Reduced-force air whips, careful distance and dwell control |
| Inspection difficulty | Straightforward, rigid walls hold shape for borescope work | Higher. Sagging sections and compressed low points hide debris |
| Expected lifespan | 20 to 30+ years with proper maintenance | 10 to 15 years typical, shorter with repeated aggressive cleaning |
| Airflow resistance | Low, smooth interior wall | Higher baseline resistance from the corrugated liner surface |
| Replacement consideration | Rarely economical to replace instead of clean | Often more economical to replace than to clean aggressively |
That last row deserves attention. Flexible duct is inexpensive relative to labor cost, and a section that requires aggressive intervention to clean properly is frequently a candidate for replacement rather than continued service.
When Flexible Duct Should Be Cleaned Instead of Replaced
Cleaning is the correct engineering decision when the duct structure itself is sound and the contamination is surface level. Replacement becomes the better decision once the structure is compromised, because at that point cleaning cannot restore the duct to a safe operating condition regardless of technique.
Clean the duct when contamination is limited to dust, light debris, or early stage biological growth on an intact liner with normal geometry. Flex duct that shows crushed or kinked sections, torn or punctured liner material, deteriorated insulation that has separated from the vapor barrier, or duct that has exceeded roughly 15 years of service life in a system with heavy contamination history is generally a replacement candidate. Severe microbial contamination that has penetrated the insulation layer, rather than sitting on the liner surface, also falls outside what cleaning can reliably resolve, since the fiberglass matrix cannot be effectively decontaminated once organic material has colonized it internally.
The decision is not purely visual. A section that looks intact from the access point can be crushed or torn several feet further along the run, which is why inspection has to precede any cleaning decision rather than follow it.
What NADCA Recommends for Flexible Duct Cleaning
NADCA does not treat flexible duct as automatically off-limits for cleaning, and it does not treat it as automatically safe either. ACR, The NADCA Standard, addresses flex duct under its System Components Assessment provisions, which place the determination of cleaning versus replacement inside a documented pre-cleaning assessment rather than leaving it to field judgment made after agitation has already started.
The core position is straightforward. Flexible duct can be cleaned using negative pressure methodology, including agitation and vacuum extraction, when the assessment confirms the duct structure is sound. NADCA has specifically pushed back on the idea that negative air cleaning is categorically unsuitable for flex duct, noting that the standard is itself built around negative pressure as the governing containment method regardless of duct material. The determining factor is condition, not duct type.
This is why the assessment step is not a formality. A technician who skips inspection and moves straight to agitation has no basis for knowing whether the duct in front of them qualifies for cleaning under the standard at all. Assessment identifies compromised liner material, deteriorated insulation, and structural damage before agitation force is ever applied, which is the only point in the process where that information can still change the plan rather than confirm a mistake already made.
The limitation is equally direct. Cleaning cannot restore a duct that has already failed structurally. No agitation method, however gentle, repairs a torn liner or reverses insulation degradation. Once that threshold is crossed, replacement is not a conservative fallback. It is the only option that returns the system to a compliant, functional condition.
Pre-Cleaning Inspection Procedures
Every flex duct job starts with inspection, not agitation. Skipping this step is how contractors end up cleaning duct that should have been flagged for replacement, or worse, applying agitation force to a section that was already structurally compromised before the crew arrived.
A proper inspection sequence includes a visual walk of accessible sections to check support strap condition, spacing, and tension, since sagging duct between supports creates low points where debris collects and airflow drops. Video or borescope inspection through access points reveals conditions that are not visible from the ends of the run, including localized compression, liner tears, and disconnected joints at boots and collars. Technicians should specifically look for crushed sections where the duct has been compressed against framing or other trades’ work, torn or punctured liner sections, insulation that has visibly detached from the liner or vapor barrier, and any point where airflow resistance suggests a partial obstruction rather than general contamination.
Documenting these conditions before cleaning begins protects the contractor as much as it protects the duct. A pre-existing tear that gets discovered mid-cleaning without documentation looks like the crew’s mistake, even when it was not.
The Correct Flex Duct Cleaning Method
Once inspection confirms the duct is a cleaning candidate rather than a replacement candidate, the workflow follows a specific sequence built around minimizing structural stress while maximizing debris removal.
The system is placed under negative pressure before any agitation begins. Every access point except the working access is sealed, and the vacuum source is confirmed to be pulling continuously before tools enter the duct. This is not optional for flex duct the way it is sometimes treated as optional on short residential sheet metal runs. Because the liner is film-thin relative to sheet metal, agitation without established negative pressure allows dislodged particulate and fiberglass fragments to pressurize locally against the liner surface instead of transporting toward the collection point, which increases the mechanical stress the liner experiences during the same agitation event.
Agitation tools are then selected based on the duct’s condition and diameter rather than defaulting to whatever tool cleared the last job. The technician works the tool from the vacuum source outward, or in longer runs from the far end back toward the vacuum, moving debris in the direction of established airflow rather than working against it. This sequencing logic mirrors the working-zone principle used on larger commercial duct cleaning projects, where debris is always mobilized toward already-cleaned sections rather than into zones that have not yet been agitated. It matters more in flex duct than in metal duct because the corrugated liner surface already creates higher friction against debris movement. Working against the transport direction forces debris to travel further against that resistance, which means more total agitation contact time against the liner to achieve the same result.
Throughout the process, vacuum pressure is monitored rather than assumed. A drop in measured suction partway through a run typically indicates a developing blockage or a collapsed section, and continuing to agitate blindly past that point risks driving debris into a low spot rather than clearing it.
Approved Agitation Methods for Flexible Duct
The tools appropriate for flex duct share one design characteristic: they move debris through contact or air pressure without concentrating mechanical load on a single point of the liner.
Soft skipper balls, pulled through the duct on a line rather than driven by a rotating shaft, dislodge debris through repeated light contact distributed across the liner’s inner surface. Because they are not powered or rigid, they cannot apply the sustained rotational pressure that damages liner film, and their round profile spreads contact force over a wider area than any bristle tip would. Pneumatic air sweep tools, which move air across the liner surface rather than scraping it, loosen dust and fine debris using airflow shear rather than physical abrasion, making them well suited to runs with intact but aging liner material. Foam contact tools flex with the corrugation of the duct itself, which means they conform to the liner’s shape instead of forcing the liner to conform to the tool, further reducing point-load stress. Low-force air whip systems, set well below the PSI used on sheet metal, use flexible tentacles tipped with air nozzles to dislodge debris through a combination of light contact and moving air, without the concentrated impact force of a stiffer whip run at full pressure.
The shared engineering principle across all four tool types is distributed, low-magnitude force applied over time, rather than concentrated force applied briefly. A liner that can tolerate repeated gentle contact across its full circumference cannot necessarily tolerate the same total force delivered through a single stiff bristle tip, which is exactly why aggressive rotary brushes remain the leading cause of liner failure on flex duct jobs even when operated by experienced technicians who simply have not adjusted their technique for the material.
Cleaning Methods Contractors Should Avoid
Several tools and techniques that are standard practice on sheet metal duct cause disproportionate damage on flexible duct, and understanding the mechanism behind each failure mode is what separates a contractor who avoids the mistake from one who repeats it.
Oversized rotary brushes, sized for the nominal diameter of the duct rather than sized down to account for the liner’s give, apply continuous rotational contact pressure that can catch and tear the film liner, particularly at seams and connection points. Stiff nylon brushes concentrate force at the bristle tips rather than distributing it, and the same bristle stiffness that efficiently scours a metal wall will puncture a thin polymer liner under sustained contact. Steel cable systems, used for clearing solid obstructions in rigid piping, apply point loads that flex duct liner material is not designed to withstand at all. Excessive compressed air PSI, set at levels appropriate for scouring sheet metal, can inflate weak points in the liner or force separation between the liner and the wire helix. Aggressive mechanical scrubbing motions, back-and-forth passes with firm downward pressure, work on a rigid substrate but tear a flexible one. Uncontrolled pulling force, dragging a tool through a run faster than the liner can tolerate directional stress, is a frequent cause of liner separation at duct board connections and boot joints.
None of these methods are inherently bad practice. They are bad practice specifically applied to flexible duct, which is exactly why the distinction between duct types has to inform tool selection before the job starts, not during it.
Vacuum Collection During Flex Duct Cleaning
Vacuum performance during flex duct cleaning has to accomplish two things simultaneously: transport dislodged debris to the collection point, and maintain negative pressure without collapsing the duct itself. These goals are in some tension, because flexible duct walls are less rigid than sheet metal and can compress inward under excessive negative pressure differential, particularly in sections with reduced support or existing wear.
Correct vacuum hose routing keeps the extraction path as direct as possible, since excess hose length and unnecessary bends increase static pressure loss before the vacuum source ever reaches the working section. That loss matters more on flex duct jobs because compromised transport velocity is more likely to leave debris redistributed in a sagging low point rather than fully extracted, which is a common source of callback complaints on jobs that “looked clean” at the access point.
Vacuum placement should account for duct routing rather than defaulting to the nearest convenient access. A technical breakdown of vacuum suction mechanics and CFM behavior explains why undersized extraction can pull debris only a short distance before it resettles, which is a particular risk in flex duct where the corrugated liner surface already resists particulate transport more than a smooth metal wall does. Equipment capable of sustaining consistent CFM output at the working static pressure, such as the DuctPro Tri-Motor Duct Vacuum System, reduces the number of passes required to fully clear a run, which directly reduces cumulative agitation exposure on the liner.
Protecting Airflow Performance During Cleaning
The objective of a cleaning job is not only debris removal. It is restoring or preserving the duct’s designed airflow capacity, and flex duct geometry is easy to compromise inadvertently during the process itself.
Technicians should avoid compressing the duct laterally while working inside it, since even temporary compression from a knee, tool handle, or hose weight can leave a permanent kink in the wire helix that reduces effective diameter at that point going forward. Preserving the duct’s designed cross-sectional shape throughout the job protects the volumetric flow rate the system was engineered to deliver. Understanding the relationship between duct diameter, resistance, and required output is covered in detail in the CFM requirements framework for professional duct cleaning, which explains why even minor diameter loss compounds into measurable airflow restriction across a full system.
A related but frequently overlooked variable is total system static pressure. Contaminated duct increases surface roughness and therefore resistance, and a system already operating near its design static pressure limit has little margin before performance degrades further. The physics of that relationship, including how resistance shifts a system’s operating point on the fan curve, are broken down in this HVAC static pressure analysis, which is useful context for any contractor deciding whether a given flex run needs cleaning, replacement, or both.
Post-Cleaning Inspection and Verification
The job is not complete when the vacuum shuts off. Verification confirms the work actually achieved its objective rather than assuming it did.
Visual verification, ideally supported by borescope or video documentation, confirms the liner shows no new damage from the agitation process and that debris has been fully removed rather than redistributed. Airflow verification, using a manometer or velocity reading at the register, confirms that resistance has actually decreased compared to pre-cleaning measurements. Connections at boots, collars, and takeoffs should be checked to confirm nothing loosened during the cleaning process, since vibration and handling during agitation can work marginal connections loose over the course of a job. Findings from all three checks should be documented as part of the service record, both for the client and for the contractor’s own liability protection.
Common Contractor Mistakes
The recurring failure pattern across flex duct jobs traces back to a small set of avoidable decisions. Treating flex duct identically to sheet metal duct, without adjusting tool selection or force, remains the most common source of preventable liner damage. Running compressed air at PSI levels calibrated for rigid duct causes liner stress that is not always visible until the section is reopened later. Working unsupported duct runs, where sagging sections are agitated without addressing the underlying support issue, treats a symptom while leaving the structural cause unresolved. Selecting brush tools based on habit rather than duct type continues to be a leading cause of liner tears on otherwise straightforward jobs. Skipping pre-cleaning inspection removes the information needed to make an informed clean-or-replace decision. Cleaning duct that has already crossed into replacement territory, usually to avoid an uncomfortable conversation about cost, typically results in a shorter-lived repair and a customer who returns with the same complaint within a year.
Clean or Replace? A Practical Decision Framework
| Condition Observed | Recommended Action |
| Light dust or debris, intact liner, normal geometry | Clean using approved agitation methods |
| Early stage surface mold on intact liner | Clean with appropriate biological treatment protocol |
| Crushed or kinked section, structure otherwise sound | Repair or replace affected section, then clean remainder |
| Torn or punctured liner | Replace affected section |
| Insulation separated from liner or vapor barrier | Replace affected section |
| Duct age beyond 15 years with heavy contamination history | Replace |
| Microbial contamination penetrated into insulation layer | Replace |
| Severe compression restricting effective diameter | Replace |
Flex Duct Cleaning Checklist
Use this sequence to confirm a flex duct job is following the correct method from assessment through closeout.
- Pre-inspection completed, including visual and video or borescope review of accessible sections
- Clean vs replace decision made and documented based on inspection findings, not assumption
- Negative pressure established and confirmed active before any agitation begins
- Appropriate agitation tool selected for flex duct, with rigid brush and high-PSI options excluded
- Vacuum performance verified throughout the run, not only at the start
- Liner protected from lateral compression and point-load contact during agitation
- Airflow verified after cleaning using a manometer or velocity reading at the register
- Findings documented, including any pre-existing damage identified before work began
Best Practices for Long-Term Flexible Duct Performance
Contractors who consistently protect flex duct condition over multiple service cycles tend to follow a few disciplined habits. They document duct condition at every service visit, not only when something looks wrong, which builds a usable history for future clean-or-replace decisions. They match agitation tools and pressure settings to duct type before starting, rather than adjusting after noticing a problem. They flag support and routing issues to the property owner or facility manager even when those issues are outside the immediate scope of the cleaning job, since unsupported runs create recurring damage regardless of how carefully the cleaning itself is performed. They stay current with NADCA guidance on flexible duct handling, since standards in this area continue to evolve as flex duct materials and construction methods change.
Conclusion
Flexible duct is not a lighter version of sheet metal duct. It is a different structure with different failure modes, and a cleaning method built around rigid duct assumptions will eventually damage it. The contractors who consistently avoid callbacks and liner damage are the ones who treat flex duct as its own discipline, starting with inspection, matching tool and pressure selection to the material, and knowing when the correct engineering answer is replacement rather than continued cleaning. That discipline is what separates a durable repair from a temporary fix that fails again within a year.